Technology
How To Make A Full Lace Wig Cap

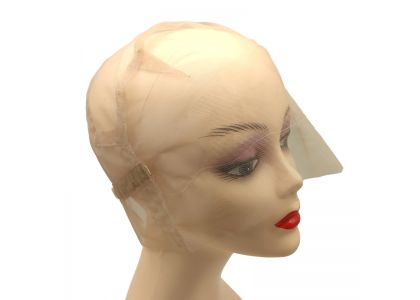
How To Make A Full Lace Wig Cap--A Comprehensive Guide: Crafting Your Own Full Lace Wig Cap
Introduction:
Full lace wigs have become increasingly popular due to their versatility and natural appearance. While purchasing a pre-made wig cap is a convenient option, creating your own full lace wig cap can be a rewarding and cost-effective alternative. In this blog post, we will guide you through the process of making your own lace wig cap, allowing you to customize it to your liking and achieve a flawless fit. Let's dive into the step-by-step instructions.
Materials Needed:
1. Swiss lace or French lace
2. Wig cap or nylon stocking cap
3. Wig head or mannequin head
4. T-pins
5. Scissors
6. Measuring tape
7. Marker or fabric chalk
8. Sewing needle and thread (matching lace color)
9. Wig combs or wig clips
10. Elastic band
Step 1: Measuring and Preparing the Cap Wig
To ensure a proper fit, begin by measuring the circumference of your head using a measuring tape. Write down the measurement as a reference for later steps. Next, place the wig cap or nylon stocking cap onto a wig head or mannequin head to create a stable base for working.
Step 2: Marking the Lace
Take the Swiss lace or French lace and lay it over the wig cap, ensuring it covers the entire surface area. Use a marker or fabric chalk to trace the outline of the cap onto the lace. Be precise in your markings to achieve an accurate fit.
Step 3: Cutting the Lace
Carefully cut along the marked lines on the lace using sharp scissors. Take your time to ensure clean and smooth edges. It is crucial to maintain the shape and size of the cap during this step.
Step 4: Sewing the Lace
With the lace cut to match the wig cap shape, pin the lace onto the cap using T-pins. Start by securing the lace at the front hairline and work your way towards the back, making sure it aligns perfectly with the cap's edges. Once the lace is pinned securely, use a needle and thread to sew the lace onto the cap. Employ small, discreet stitches along the perimeter of the cap, taking care to maintain tension and avoid puckering.
Step 5: Customizing the Cap
Now that the lace is securely attached, you can customize the cap further to enhance the wig's stability and comfort. Sew wig combs or wig clips onto the inside of the cap, around the hairline, to help anchor the wig to your natural hair. Additionally, attach an elastic band to the back of the cap to provide a snug fit and prevent the wig from shifting during wear.
Step 6: Finishing Touches
Once you have completed the sewing and customization process, carefully remove the T-pins from the cap. Inspect the lace to ensure it is securely attached to the cap, making any necessary adjustments or reinforcement stitches. Trim any excess lace that extends beyond the hairline for a seamless look.
Conclusion:
Crafting your own wig lace cap allows you to personalize your wig and achieve a perfect fit. By following the step-by-step instructions outlined in this guide, you can create a high-quality wig cap tailored to your preferences. Remember to take your time, be meticulous, and enjoy the creative process. Now, you are ready to embark on the journey of creating beautiful and natural-looking full lace wigs. Happy wig-making!
 Contact us with Whatsapp