Technology
How To Make a Closure Wig With a Dome Wig Cap
How To Make a Closure Wig With a Dome Cap: The Ultimate Guide to Creating a Closure Wig with a Dome Wig Cap
Introduction:
Closure wigs have become increasingly popular due to their versatility and natural appearance. Making your own closure wig allows you to customize the style, length, and density to suit your preferences. In this blog post, we'll take you through a step-by-step process of creating a closure wig using a dome cap. With a dome cap, you can achieve a seamless and comfortable fit while maintaining the illusion of a natural hairline. So, let's dive in and discover how to create your own closure wig!
Materials Needed:
1. Closure (lace or silk)
2. Wefts/bundles of hair extensions
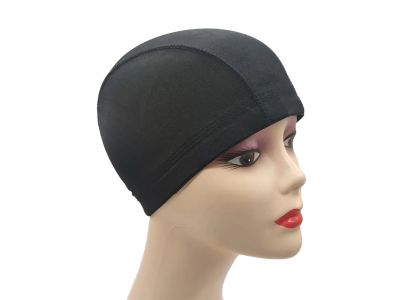
3. Dome wig cap
4. Mannequin head or wig stand
5. T-pins or wig clips
6. Scissors
7. Needle and thread (in a matching color)
8. Wig cap (optional, for added security)
9. Wig combs (optional, for added security)
Step 1: Preparing the mesh dome wig cap
Start by measuring your head circumference to ensure a proper fit.
Place the adjustable dome wig cap on a mannequin head or wig stand to stabilize it.
Pin the black dome wig cap securely to the base using T-pins or wig clips.
If desired, place a wig cap over the dome cap for extra security and to prevent the wefts from showing through.
Step 2: Preparing the Closure
Take your closure (lace or silk) and position it on the dome style wig cap to determine the desired placement.
Use T-pins to secure the closure in place temporarily.
Carefully trim any excess lace around the edges of the closure, leaving a thin lace border (about 1/4 inch) to ensure a natural-looking hairline.
Step 3: Creating the Wig Foundation
Begin by sewing a line of wefts onto the dome cap, starting at the nape and working your way up.
Measure and cut the wefts to fit the circumference of the mesh dome cap for wigs.
Sew the wefts horizontally using a needle and thread, ensuring they are securely attached.
Continue adding wefts until you reach the closure area, leaving enough space for the closure to be sewn.
Step 4: Attaching the Closure
Once the foundation is complete, remove the temporary T-pins holding the closure in place.
Apply a thin layer of glue or adhesive along the lace border of the closure.
Carefully position the closure on the dome cap, aligning it with your natural hairline.
Press the closure down firmly onto the glue or adhesive to secure it in place.
Step 5: Customizing and Styling
Trim and style the closure wig to your desired length and shape.
If needed, use flat irons or curling irons to straighten or curl the hair.
Customize the wig further by adding baby hairs or parting the closure as desired.
Conclusion:
Creating your own closure wig using a dome cap can be a rewarding and cost-effective way to achieve the hairstyle you desire. By following these step-by-step instructions, you'll be able to craft a closure wig that fits comfortably and looks incredibly natural. Remember to experiment with different styles and techniques to unleash your creativity and achieve the perfect closure wig for you. So, get ready to rock your new wig with confidence and style!
 Contact us with Whatsapp