Technology
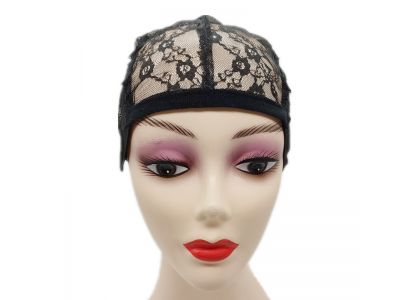
How To Make a Wig Cap

How To Make a Wig Cap: A Step-by-Step Guide
Introduction:
Wigs are a fantastic way to transform your hairstyle and experiment with different looks. However, to ensure a seamless and comfortable fit, a wig caps is essential. While you can purchase wig caps for making wigs from stores, making your own allows you to customize the size, material, and overall comfort. In this blog post, we'll take you through a detailed step-by-step guide on how to make your very own wig cap. Let's get started!
Materials Needed:
1. Stretchy fabric (nylon, spandex, or stocking material)
2. Measuring tape
3. Scissors
4. Thread
5. Sewing machine (optional)
6. Elastic band
4. Straight pins
8. Marking pen or tailor's chalk
Step 1: Take Measurements
Start by measuring the circumference of your head. Place the measuring tape at your hairline, just above your ears, and around the back of your head. Note down this measurement, as it will determine the size of your wig cap.
Step 2: Cut the Fabric
Using your measurements, cut a rectangular piece of stretchy fabric. The width of the fabric should be the same as the circumference of your head, plus an additional inch for seam allowance. The length of the fabric should be the distance from your forehead to the nape of your neck.
Step 3: Sew the Side Seam
Fold the fabric in half lengthwise, with the right sides facing each other. Pin the long side of the fabric together. If you're using a sewing machine, stitch along the pinned side using a straight stitch. If you don't have a sewing machine, you can hand-stitch the seam using a needle and thread.
Step 4: Sew the Back Seam
Next, fold the fabric again, this time aligning the short ends. The fold should be on the same side as the side seam you just stitched. Pin the short ends together, ensuring that the right sides of the fabric are facing each other. Sew along the pinned edge using the same method as before.
Step 5: Attach the Elastic Band
Measure the circumference of your head again, but this time, subtract about an inch from the measurement. Cut a piece of elastic band according to this adjusted measurement. Sew or hand-stitch the ends of the elastic band to the open ends of the fabric, forming a loop.
Step 6: Create the Crown Area
Put the wig cap on your head to determine the placement of the crown area. Use a marking pen or tailor's chalk to draw a semicircle or an oval shape on the fabric. This area will accommodate your natural hair when you wear the wig. Cut along the marked lines, leaving enough fabric to comfortably cover your hair.
Step 7: Finish the Edges
Fold the raw edges of the crown area inward and stitch them down using a straight stitch. This will prevent fraying and give a neater finish to your wig cap.
Step 8: Test and Adjust
Put the wig cap on your head to check the fit and comfort. Make any necessary adjustments, such as tightening or loosening the elastic band, or trimming the edges for a better fit.
Conclusion:
By following these step-by-step instructions, you can create your own customized wig cap that perfectly fits your head and provides a comfortable base for your wigs. Making your wig cap allows you to choose the fabric, size, and design, ensuring that your wig-wearing experience is seamless and enjoyable. So, unleash your creativity, experiment with different materials, and get ready to rock your wigs with confidence!
Remember, practice makes perfect. Don't be discouraged if your first attempt doesn't turn out exactly as you imagined
 Contact us with Whatsapp